Monday, January 6, 2014

DIY Using Wood and Burlap

What you will need:
- 8 1/4 x 5 1/2 x 1 1/2 inch piece of wood (or any size you'd like to work with)
-Wood Finish
-Old rag
-Newspaper or something like it
-Clear Acrylic Sealer
-Burlap
-Scissors
-Quilt Pen
-A Cricut or Di-cut machine and paper
-Tacky Glue

Start with you Piece of wood. I used a 8 1/4 x 5 1/2 x 1 1/2 inch piece of wood. I had mine cut for me at my local home improvement store.
First, we need to stain it... so grab your wood, old rag, wood finish, and newspaper (I used a paper grocery bag).

You may want to do this outside. Lay your wood on your newspaper or bag. Use your old rag to rub the wood finish onto your piece of wood. Make sure you fill in all those tiny cracks!


Once your finished let it dry for a few hours. 
Next you'll want to seal your finish. You will want to do this outside as well.


Make sure you cover the whole piece of wood. Spray as directed on the can.
When you're finished...let it dry outside. I left mine outside overnight to get rid of the smell too!

Now we can start on your burlap...
You will want to cut a piece of burlap slightly smaller than the face of your wood. If you cut your burlap along a certain strand it makes your next step easier. 
Next pull about 4-5 burlap strands off all 4 sides of your burlap piece. It should now look something like this...
Now you will need to cut out stencils on your di-cut machine. I used a Cricut machine and these are the sizes I used...
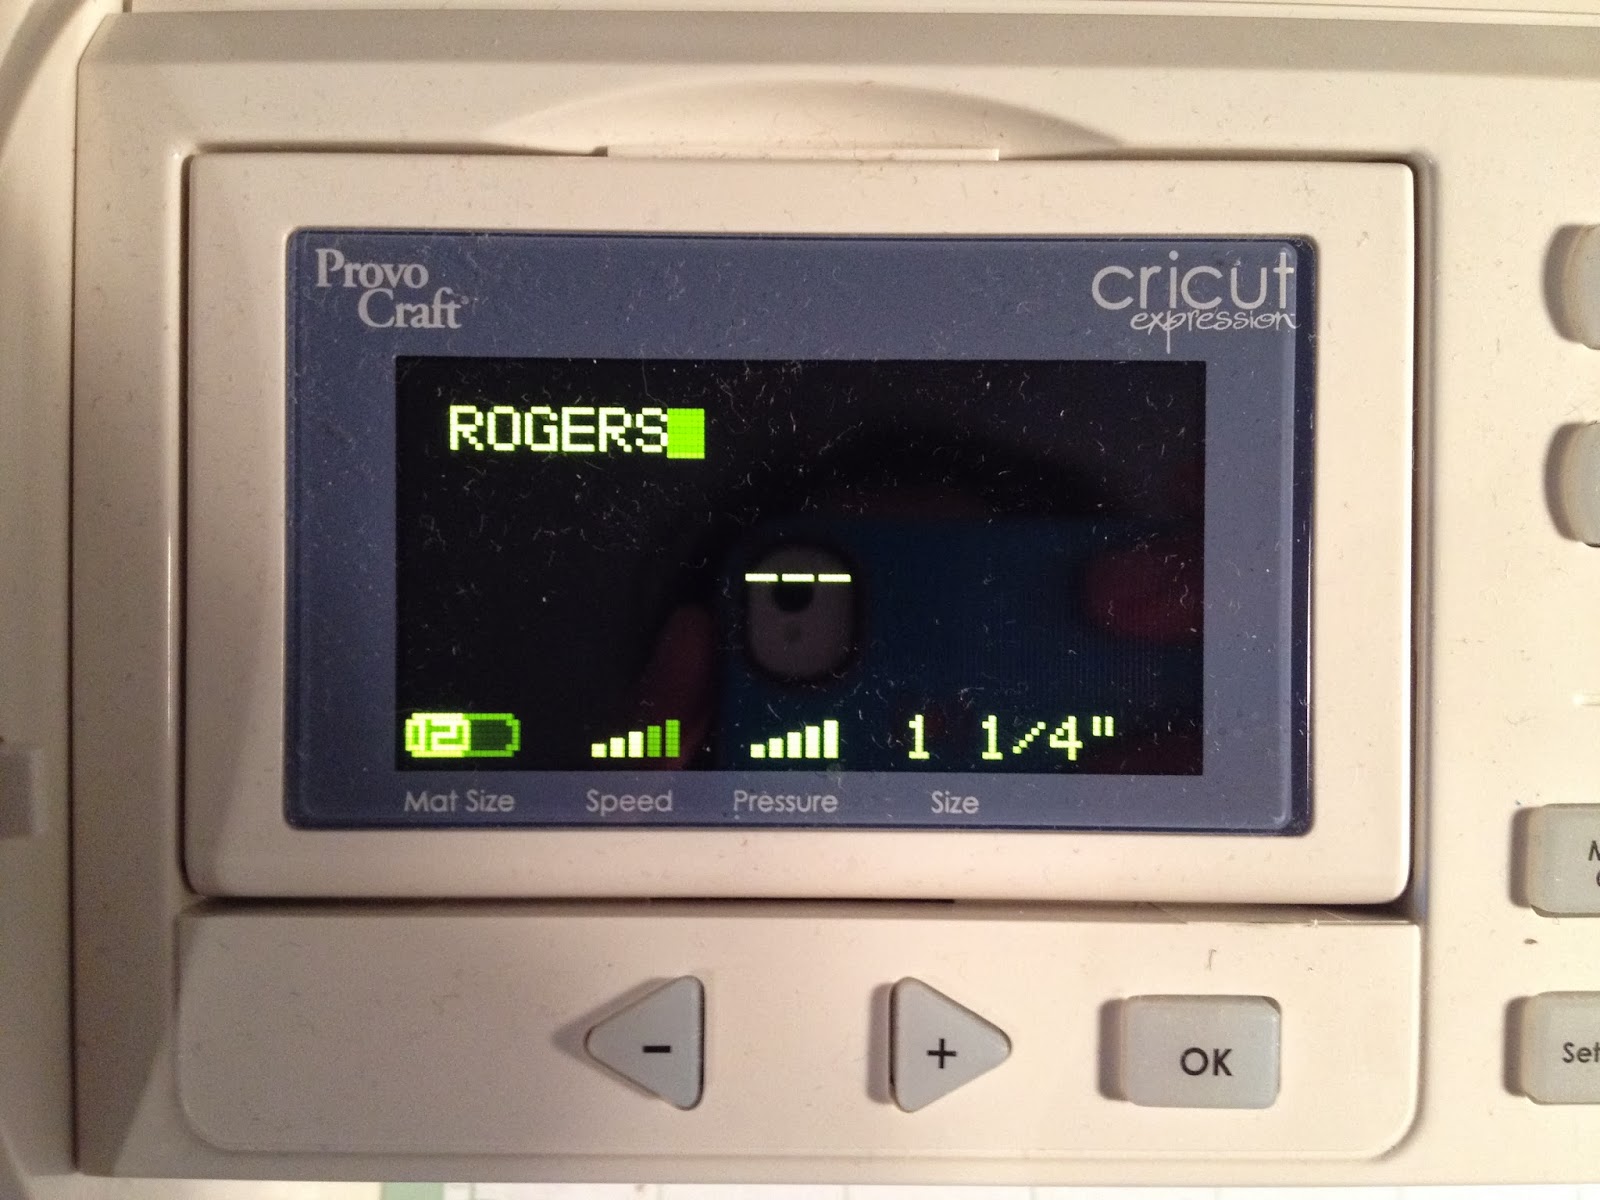


*** You may need to adjust the size of the last name depending on how many letters it has ***

Lay your stencils out to make sure they fit. Next use your quilt pen to trace each letter. I started with the 2 middle letters to make sure it was centered.


Filling in the letters can be time consuming. You will need to color each strand of burlap.


Once you finish the last name- lay out your bottom layer of letters


And follow the same directions as the last name.

Here is the burlap when finished...

Now we can glue to burlap to our finished wood. Make sure your piece of wood is dry before you glue.

Dot each corner of the back of your burlap. This keeps the strands from fraying. Then dot the glue on the rest of the burlap.

Then Place it on your piece of wood, centered. 


***Note: The glue will dry CLEAR***

Once the glue is dry it is ready for display!


These are great for Wedding shower gifts, Christmas gifts, Birthday gifts, or to make for yourself!

Happy DIYing!
~Mrs. Rogers

Friday, January 3, 2014

DIY: Dried Flower Box Display

After their wedding, brides like to save their flowers to remember their special day. Whether they are displayed dried and in a vase or made into a Christmas ornament or anything in between. Well why not a DIY display to hang in your home? My mother-in-law, Julie Rogers, dried all of my flowers from my wedding and then helped me with this idea...A flower box!

You will need...
-Your dried flowers
-A hot glue gun
-Spray Mount Adhesive
-1 Yard of burlap
-An old window
-Wood to make a frame
-Wood the same dimensions of your window (for the backing)


First take your window and your wood to make a frame. You will want your frame to be about 3-4 inches deep. My Father-in-law did this part for me. He used bead board to screw into the old window.


Next you can take greenery from your flowers to make the bottom of your flowers box. I hot glued them to the window rather than to the back piece (which is coming up...) You want to make sure you cover it well. Here is mine...


Now let's work on the back board. You can attach your burlap piece to the board (I also used bead board for this) using the Spray Mount Adhesive.  Leave a few inches around the edges so you can wrap it around the back. This is the Spray Mount Adhesive I used...


 Once your burlap is attached to the front of the back board you can hot glue the excess to the back of the board. Like this...


Now the fun part...gluing the flowers on! You will want to go from the back to the front. I started with baby's breath, then billy balls, gerber daisies, and I did hydrangeas last. You will want your flower box to have some height or all you will see is burlap and a cluster of flowers at the bottom. Use your stemmed flowers for your height. Save you fuller flowers for the bottom. You want it to be realistic. Make sure you hot glue the stem down well. You can just dot the backs of the flowers. Leave space at the bottom and the edges for the rest of your flowers and your frame. 


When you are done with this you can add your fuller flowers. I went back through and filled in some of the empty looking spots, too.


When you have finished gluing all of your flowers down you can spray them with a cheap scentless hairspray to keep them stiff. No need to drench them... just cover them well. Let it air out and then you can attach the back board to your frame. My father-in-law also did this part for me. A staple gun will work best. Make sure you line up your corners!!

And the finished product...


This can be hung on the wall or displayed on a table. As for the frame...you could either paint it to match the color of your walls or to match the window. As you can see I am still deciding! 

This is a great way to display your flowers from your special day!

Happy DIYing,
~Mrs. Rogers

Wednesday, July 24, 2013

Registry Tips: Do and Don't

THE WORD IS OUT!! I'm going to be an AUNT! My brother and sister-in-law are pregnant! They are due February 14th. The day after Harrison's 1st birthday! I'm so excited!!

This got me thinking about registry... I received things I still don't use and I had to buy things I found out I needed but hadn't registered for. So, here are my "registry tips"


Things you need that you might not think of or what I think are necessities:


A portable bassinet. Especially if you travel in the car. I drive back and forth to Georgia a lot. I bought this just in case Harrison wasn't up for a 14 hour day and we had to stop somewhere to spend the night. Sure enough, I have used it several times.

Swaddle Bags. They might love them and they might hate them. But if they love them you will too! We put Harrison in them and he started sleeping through the night right before he was 2 months old. If we didn't put him in these then he would swing his arms around and wake himself up.

Bottles. Even if you are planning on breast feeding. I was planning on breast feeding Harrison but I wasn't able to produce enough. So when I needed bottles I already had them. I have Tommee Tippee bottles. I picked those because they are supposed to be good for BF babies or for supplementing.

A Swing. great for when you just need to put them down for a minute. Also great for naps.

A Bouncer. These are for 4+ months but you will definitely use it when the time comes. Harrison loves his. It's great when I need to throw a load of laundry in or whip up something to eat. It keeps them busy and it keeps them in an upright position which Harrison LOVES.

A Travel System Stroller and Carseat. This way the carseat with fit in the stroller. And it is actually cheaper than if you bought the carseat and stroller separate. This is really helpful if our baby falls asleep and you need to out them in the stroller. Plus they match! ;)

Aden and Anais Blankets. They are PERFECT if you live somewhere hot like Texas! And they are great for swaddling. They are really thin and light. They are also really soft and cozy. I use these blankets more than any others. I'm sure when winter time comes I'll use heavier blankets but, these are GREAT.

Spoons and Bowls. You're going to need them at 4 months. You might as well put a few on your registry. Even if you don't receive them, most places with give you a certain percentage off what is left on your registry after the event date.


Things that aren't so necessary:

More than one high chair. Register for either a full highchair or the ones that you strap to a chair. You won't need both. I keep my full highchair next to the table in the kitchen. Its always ready when I need it.

Clothes. I mean outfit type clothes. You can register for a few sleepers or gowns but as far as clothes go, don't register for them. A lot of people with throw in a cute outfit with their gift. And if you have a mother like mine you'll never have to buy any clothes for them =P

Receiving Blankets. The only use I have found for these is to make them pajama pants. I tried to use one as a swaddle the first night Harrison was at home and it was too small. He was 7 1/2 pounds! I would stick with Aden and Anais blankets. If you find a pack with cute prints and know how to sew then they are great for pj's!

Carseat Toys. I think I received 5,000 of these. And I have 1 carseat! Like clothes, people might add one of these to make the packaging pretty or just to throw something in with their gift.


These are just a few things I can think of at the moment. But, I'm also running on just a little sleep so I will probably think of more. But for now, this is a good start. :)


Happy Registering!
~Mrs. Rogers


Wednesday, July 10, 2013

Baby Bullet 101

I got my Baby Bullet out a few weeks ago, but at that time all i used it for was to make some hard boiled eggs.... (yes it does that too!)

So, this week I actually used it to make Harrison's food. He has been eating peas for a little over a week but I was just buying organic baby food at the store because we've been traveling.

I made green beans this time!

I started out with the Baby Bullet Steamer, Organic green beans, and the Baby Bullet User Guide. I have the Baby Bullet and the other User Guide to the side.
 Next, I snapped the ends off the green beans and eye balled how many green beans were in there.
 All I had to do was put 1/2 cup of water into the steamer and press start on setting 1. Minutes later they were done!
 I placed the steamed green beans in the Baby Bullet with about 1/4-1/2 cup of water. You can always add more if needed.
 All you have to do now is push down for 10 seconds
 And voila!!! Pureed green beans in just minutes.
 I put them in the Baby Bullet canisters and threw them in the fridge. They last for 3 days in the fridge or 30 days frozen.

I would highly recommend the Baby Bullet to any mom. It is a fast and cheaper way to feed your baby. Store bought baby food can really add up. And there are no added preservatives and any of those yucky things for babies! Harrison has loved his peas and green beans that I've made him! 

Enjoy! 
~Mrs. Rogers

Monday, July 8, 2013

Beach Bumming with Baby!

Not only did I fly with Harrison (last post) but we went to the beach too! Tips for the beach are always helpful too!
We have had Harrison in the pool at home before but this was his first trip to the sand! So...what to bring?!

Swim diapers!
Towels!
Hats!
Swim Shirts!
Bathing suits!
A Float! (with a canopy)
An Umbrella!
Beach toys!
A portable Fan!
Your Stroller!
All the food you'll need for baby!
Camera!

When you head to the beach or the pool find a spot with shade or an umbrella. Babies aren't supposed to wear sunscreen until they are 6 months old. 

Have your fan going all day! Your baby is going to get hot! We ended up leaving Harrison in just his diaper if he wasn't in the water.
If you don't want your baby to get sandy then don't go to the beach. It's bound to happen. But when you head back to your room just give them a quick bath.

Bring toys for them to play with. Even if they are beach toys. I don't think your baby is going to make a sand castle but they are great for chewing and great for pictures!

If your baby can sit up you can bring a float that will hold water in it and put your baby in some water to keep them cool. I have seen people bring their babies bath tub out and do the same thing. Whatever suits your fancy!

If you are out at the beach at a "solid feeding" you can always use your stroller to prop your baby up for feeding.

For naps, if your baby won't nap in the stroller take them up to your room for a little bit and eat lunch while they nap! They will probably enjoy the air conditioning and you might too!

**Pack 'N Plays are great for traveling**
Thankfully my in-laws have one and brought it with them. :)

Chances are your baby wont be swimming in the ocean at this age. Unless, at low tide there are some tidal pools. Those are PERFECT for babies. No waves, but they can still get in the ocean!

Take this time to relax and enjoy your baby and the beach! And take lots of pictures!!

Happy Beach Bumming!
~Mrs. Rogers
Sit Back, Relax, and Enjoy Your Flight!

For the 4th of July, my husband and I flew with our almost 5 month old, Harrison to Florida. We spent out long weekend with my in-laws. This was the second time we have flown with Harrison. The first time was much easier because he was about 2 months old and still in the "eat, sleep, repeat" stage. So here are some tips for FLYING with your baby...

If your child isn't old enough for an umbrella stroller (usually 6 months or when they can sit up) a Baby Bjorn comes in handy. Especially if you have a chunk like mine. They get really heavy really quick if you are just carrying them. The first time around I had the Bjorn on but this time my husband, Tim, did because, like I said, Harrison is a chunk (like nearly 20lbs chunk). When you go through security you DO NOT have to take off the Bjorn! They just do a hand check. They wipe your hands with a little cloth and do a test on it.

Bring several different toys. Harrison likes to play with a toy for 10-15 minutes then gets bored and wants a new one. Toys with lights are great! And toys they can chew on are good, too.

Bring pacifiers!! These are good for take off and landing to help your baby's ears pop. Harrison would rather chew on them. But, that also help when his gums start to hurt (teething!!!).

Bring several empty bottles (if you're formula feeding). I buy these packets of formula. They come pre measured (4oz) and you just open them and pour them in. I buy bottled water once I get through security and go ahead and put water in the baby bottles. I am no expert on what bottled water is best for your baby but I bought the Nestle brand because it is purified using reverse osmosis and I use reverse osmosis water at home.
Bringing formula through security is a pain. If you bring opened powder they have to do a test on it. I brought a ready to feed (8oz) and they said they could either open it and test it or give me a full body pat down. I took the pat down route because ready to feeds only last so long after you open them. So, if you are prepared for a pat down or test go or it, but make sure you allow time.

Here's the link for TSA regulations:
http://www.tsa.gov/traveler-information/food-and-beverages

I try to time Harrison's feedings so that he eats when the plane takes off. This has worked both times for his ears. He usually eats 8oz at his feedings. So, on the way down I make a 4 oz bottle and let him have that. Like I said before, he doesn't suck on pacifiers, he chews on them.


If your baby all of a sudden starts crying sometime after you get off the plane, it's probably their ears popping. But, crying is good! It helps them pop!


Enjoy your flight!
~Mrs. Rogers


Sunday, June 30, 2013

Bon Voyage! Travel Tips for You and Baby

So here's the deal...my in-laws live 14 hours away in Georgia. Which means I have a lot of travel time in the car with my, now, 4 month old. So far, I have made two long trips in the car. One to Atlanta (at 2 months) and one to Nashville (at 3 months). I was DREADING the first long car ride with him. It seems like it would be a mom's worst nightmare to put her child in a car seat for 14 hours. But this also allowed me to learn, early on, the best things to make this easy for your child.

First off, LEAVE REALLY EARLY! My son sleeps in just a plain onesie so I just change his diaper and plop him right in the seat and away he sleeps. That way you can get in a few hours of driving even before his first feeding of the day.

Next, hold you bladder until he needs his diaper changed. Less stops! We, adults, are disciplined enough to hold it! Babies, on the other hand don't like to sit in their business for very long.

Feedings were what I was most nervous about. My son is formula fed which actually makes it easier. I bring a whole bag of bottles because you never know what will happen. I put water in all of them ahead of time. You can also bring pre-measured formula in little cups (I use little plastic sweetheart cups) or just bring your container. And I feed him right in the car seat! Doesn't get any easier than that! And you have a free hand! You can also tie burps in with your bladder break and his diaper change. And WARNING: he will get stinky. You can take a wipe and clean off his neck after each one but he will still be stinky.
If you are breast feeding...see if your pump has a car adapter. And if you're up for this you could always bring a bottle of milk that you've already pumped (for his first feeding) and pump before, during, or after each feeding in the car. Just throw your nursing cover on or you might get strange looks!

Make sure you have lots of toys to keep him busy. Toys with lights are always good! And ones that sing. If they aren't grabbing at things yet, bring these kinds especially. If they are grabbing...bring these and what I call "crinkle" toys. Bring a variety because you baby is bound to get bored with one toy over a 14 hour span.

It is always good to have everything you need in arms reach. So put everything else in the back so you're not crowded.

Lastly, have a good attitude. I know that sounds cheesy but it really does make a difference. Your baby knows if you're in a bad mood and that can make them in a bad mood which results in a disaster. So look at this as a fun adventure with your baby. Go in with a positive spirit and enjoy this time you have to play with your baby (slash: keep them entertained). There are no dishes to wash and no clothes to clean. So sit back, relax, and enjoy.

As for solids...give me a month or two about that one. I will be traveling the same trip in a month or so with a solid food eating baby!

Happy Traveling!
~Mrs. Rogers